DIY Floating Shelves: A Step-by-Step Guide to Stylish Storage
DIY Floating Shelves: A Step-by-Step Guide to Stylish Storage 🪴 Intro: Small Space, Big Style (and Bigger Savings) When you live in a tiny apartment with big Pinterest dreams, every inch of wall space becomes prime real estate. As a renter and a budget-conscious millennial, you want stylish solutions that don’t leave permanent scars—or a massive dent in your wallet. That’s where DIY floating shelves come in. They’re minimalist, functional, and can totally transform a bland rental wall into a boho-chic statement piece.
Even better? You don’t need to be a woodworking wizard or own a power tool empire. Just a sprinkle of patience, a dash of creativity, and the right tools from your local Home Depot (yes, we’ve got you covered 👇).
Let’s dive into your new favorite weekend project.
🛠️ What You’ll Need (Without Blowing the Budget) Before we start measuring and drilling, let’s gather some renter- and eco-friendly supplies:
🧰 Affordable Tools & Materials Pre-sanded wood planks (opt for FSC-certified or reclaimed options)
Wall anchors (renter-friendly toggle bolts or command shelf brackets)
Level (a smart level app works, but we love this budget-friendly option from Home Depot)
Drill/screwdriver (or a combo tool)
Painter’s tape (for easy planning and less mess)
Wood stain or paint (go low-VOC for healthier indoor air)
🛒 Explore all-in-one DIY shelf kits at Home Depot — many are eco-conscious and easy on the wallet.
📏 Step 1: Measure Your Space (Then Measure Again) Nothing screams “oops” like a crooked shelf. Start by deciding where your shelf will go. Use painter’s tape to map out the length and placement—this is your visual cheat sheet.
✔️ Tip: Keep shelves around 10-12 inches deep for balance between storage and aesthetics.
📐 Step 2: Mark & Drill (Renter-Friendly Version) Most renters can’t just drill into studs without consequences, so let’s play it smart.
Use a stud finder to locate safe drilling zones—or avoid them with toggle bolts that grip behind the drywall.
Mark your anchor points with a pencil.
Pre-drill using a small bit to guide your screws (or follow your anchor instructions).
🔧 Soft Tip: If you’re extra cautious, removable shelf brackets or command strips designed for shelving can hold light decor without any drilling.
🧱 Step 3: Mount Brackets (or Go Bracketless for Style) Time to bring the base to life:
Secure your anchors or brackets.
Double-check everything is level (seriously, this is where most shelf fails happen).
Gently tug on them to test strength before adding the shelf.
🔥 Design Tip: For a true “floating” look, opt for hidden shelf brackets that screw into the wood from the back.
🖌️ Step 4: Customize the Shelf (Stain, Paint, or Go Naked?) Whether you’re a fan of rustic farmhouse or sleek Scandi vibes, your shelf should match your aesthetic.
Stain for a natural wood finish.
Paint in matte black, soft white, or sage green (a 2025 home trend favorite).
Seal with a water-based clear coat to protect from plant spills or coffee cup rings.
🎨 Eco Tip: Choose low-VOC stains and paints to keep your air quality safe and fresh.
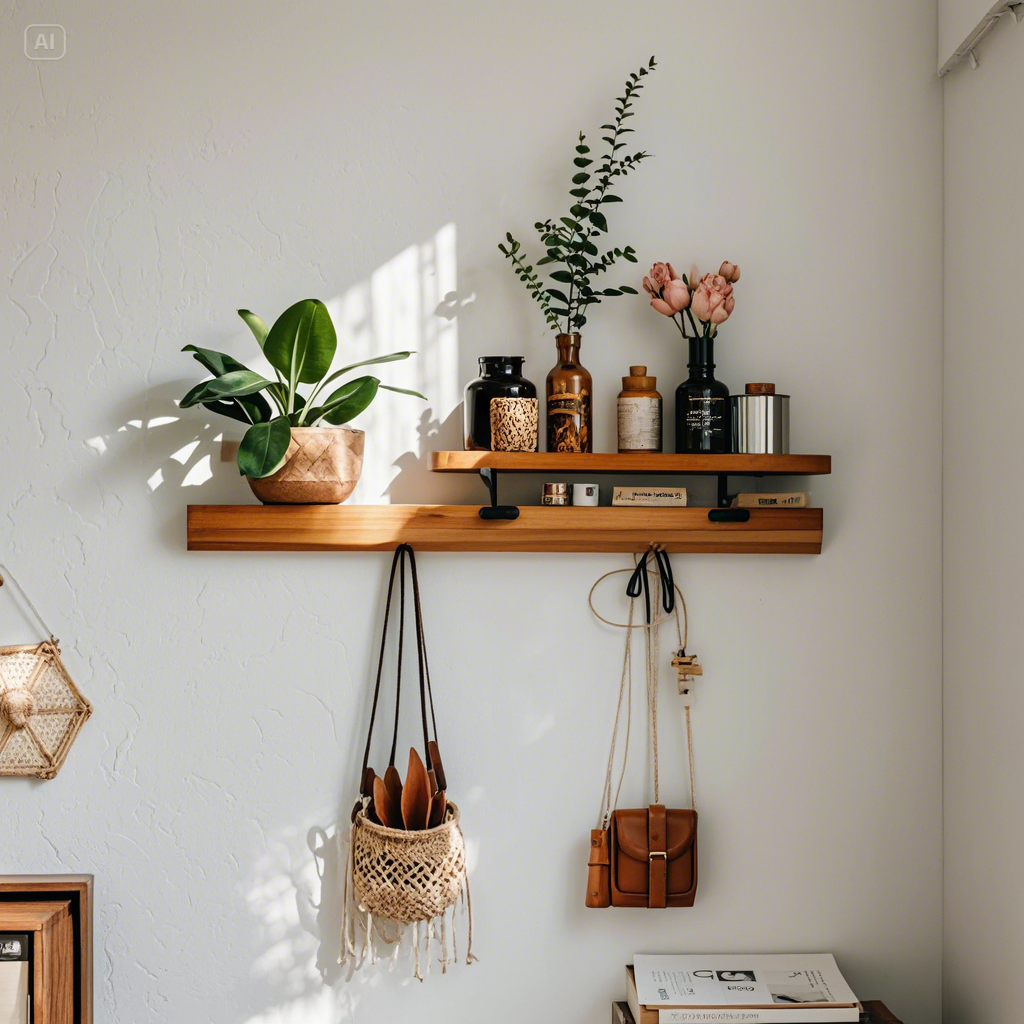
🪑 Step 5: Style It Up (And Make It Functional) You didn’t come this far to leave it empty! Floating shelves are the perfect combo of form and function.
🕯️ Decor Ideas for Renters: Lightweight books
Small plants (pothos or succulents thrive here)
LED candles or battery-powered lights
Framed photos or prints (use lightweight acrylic instead of glass)
💡 Pro Tip: Style in groups of three for visual balance. And if you’re sharing your masterpiece online, natural lighting and a cozy throw in the corner make for an Instagrammable glow-up.
🌟 Final Touch: Your Renter-Safe, Budget-Friendly Masterpiece You just created stylish, functional storage—without hiring a handyman, damaging your walls, or dropping a fortune. That’s what we call a win.
Whether you’re a weekend DIY warrior or just dabbling in renter-friendly decor, floating shelves are a game-changer. They’re cost-effective, eco-conscious, and endlessly customizable.
🛒 Explore These Budget-Friendly Tools & Materials: ✅ Eco-stain options from Home Depot
✅ Hidden shelf brackets for a clean look
✅ Affordable tool kits for DIY beginners
🛠️ Ready to Start? Style your space without breaking the bank. Explore these renter-friendly tools and kits at Home Depot and bring your DIY vision to life.